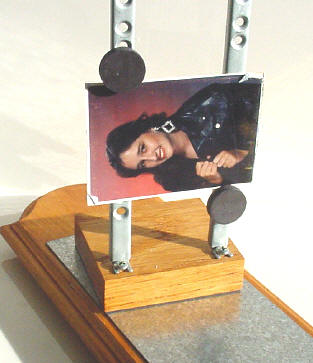
4 Magnetic Pins hold small photographs
flat for copying
How to Copy Photographs
Do you have a one-of-a-kind photograph with no
negative? Don't worry, ShotCopy along with your camcorder can
copy those photos up to 5 x 7 inches. Even if you have a larger
photograph,
you can lay the picture on a tabletop and take a picture-of-a-picture with your
digital camera. You'll be amazed at the quality of the results and
the control you have over the resulting image with today's photo editing
software!
The Basics of
Copying Photographs using ShotCopy
Step One -
Mount the Print
Use the magnetic pins to hold the print
to the rails of the slide/negative holder stand. Adjust the print so it
is level and square with the front of your camera lens to prevent
image distortion.
If you have a problem with photo reflections from
your camera's point of view, use a piece of flat black construction paper and cut a hole
for the camera lens to block reflections. Also, angle your shaded lamp or light source so
that it hits the image at a 45 degree angle to reduce reflections.
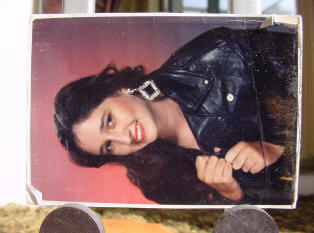
Step Two -
Shadows
Make sure there are no
shadows being cast on the area of the picture you want to copy. In
this case the magnetic pins were moved to the bottom of the photo to
stop shadows from being cast.
This photo
was kept in a wallet. Note the dog-ears, fading and dust spots.
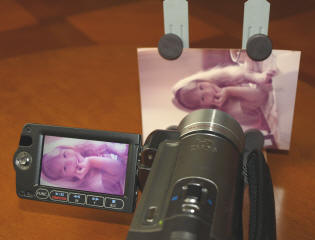
Step Three
- Crop & Cleanup
User your photo
editing software to crop and compose the
image to remove damage edges for better
composition and remove dust or
scratches. In this picture to the right you can see a scratch or fold
across the hand with a number of white dust spots and some
discoloration.
Step Four
- Saving your image
Next, save your image in the photo file format
of your choice. Usually a JPG or TIFF format. The
resulting photo will no
longer collect dust, become wrinkled or bend or fade away with time. As a digital image you can e-mail it to friends and family and even
use it in a CD-ROM photo album of your creation.